
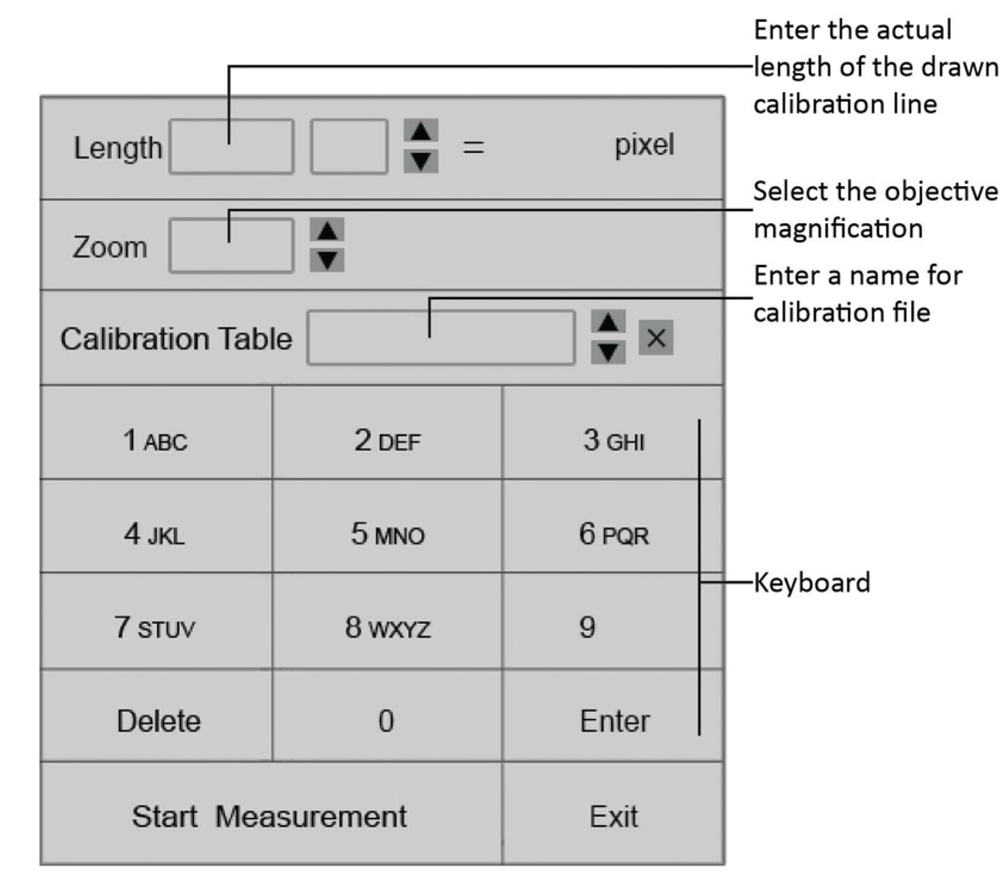
1. Click on the calibration icon  to get the calibration table to get the calibration table |
|
|
2. Move the cursor out of the calibration table to start the calibration. 1) The live image should be the calibration slide or some known dimensions specimen at this moment 2) Draw a line to get a reference length. |
|
|
3. Enter the actual length of the line drawd in Step 2. Three units options available: CM, MM and UM. |
|
|
4. Select the objective magnification in "Zoom" option. 1) This data just need to be entered if the user will use the same camera to get images at different objectives settings and do the measurement for them. In this case, no need to create calibration files for images at ll the objective settings, just change "Zoom times" to get the corresponding calibration file. 2) If only need to use one objective in your application, select "N/A" for "Zoom". |
|
|
5. Click on the rectangle area nest to the "Calibration Table" to enter a name for the newly created calibration file. Click on "Enter" to confirm name. Allow to create 10 calibration files. |
|
|
6. If already have calibration file, go to "calibration Table" to select the correct calibration file and click on "Start measurement" to do the measurement. |
|
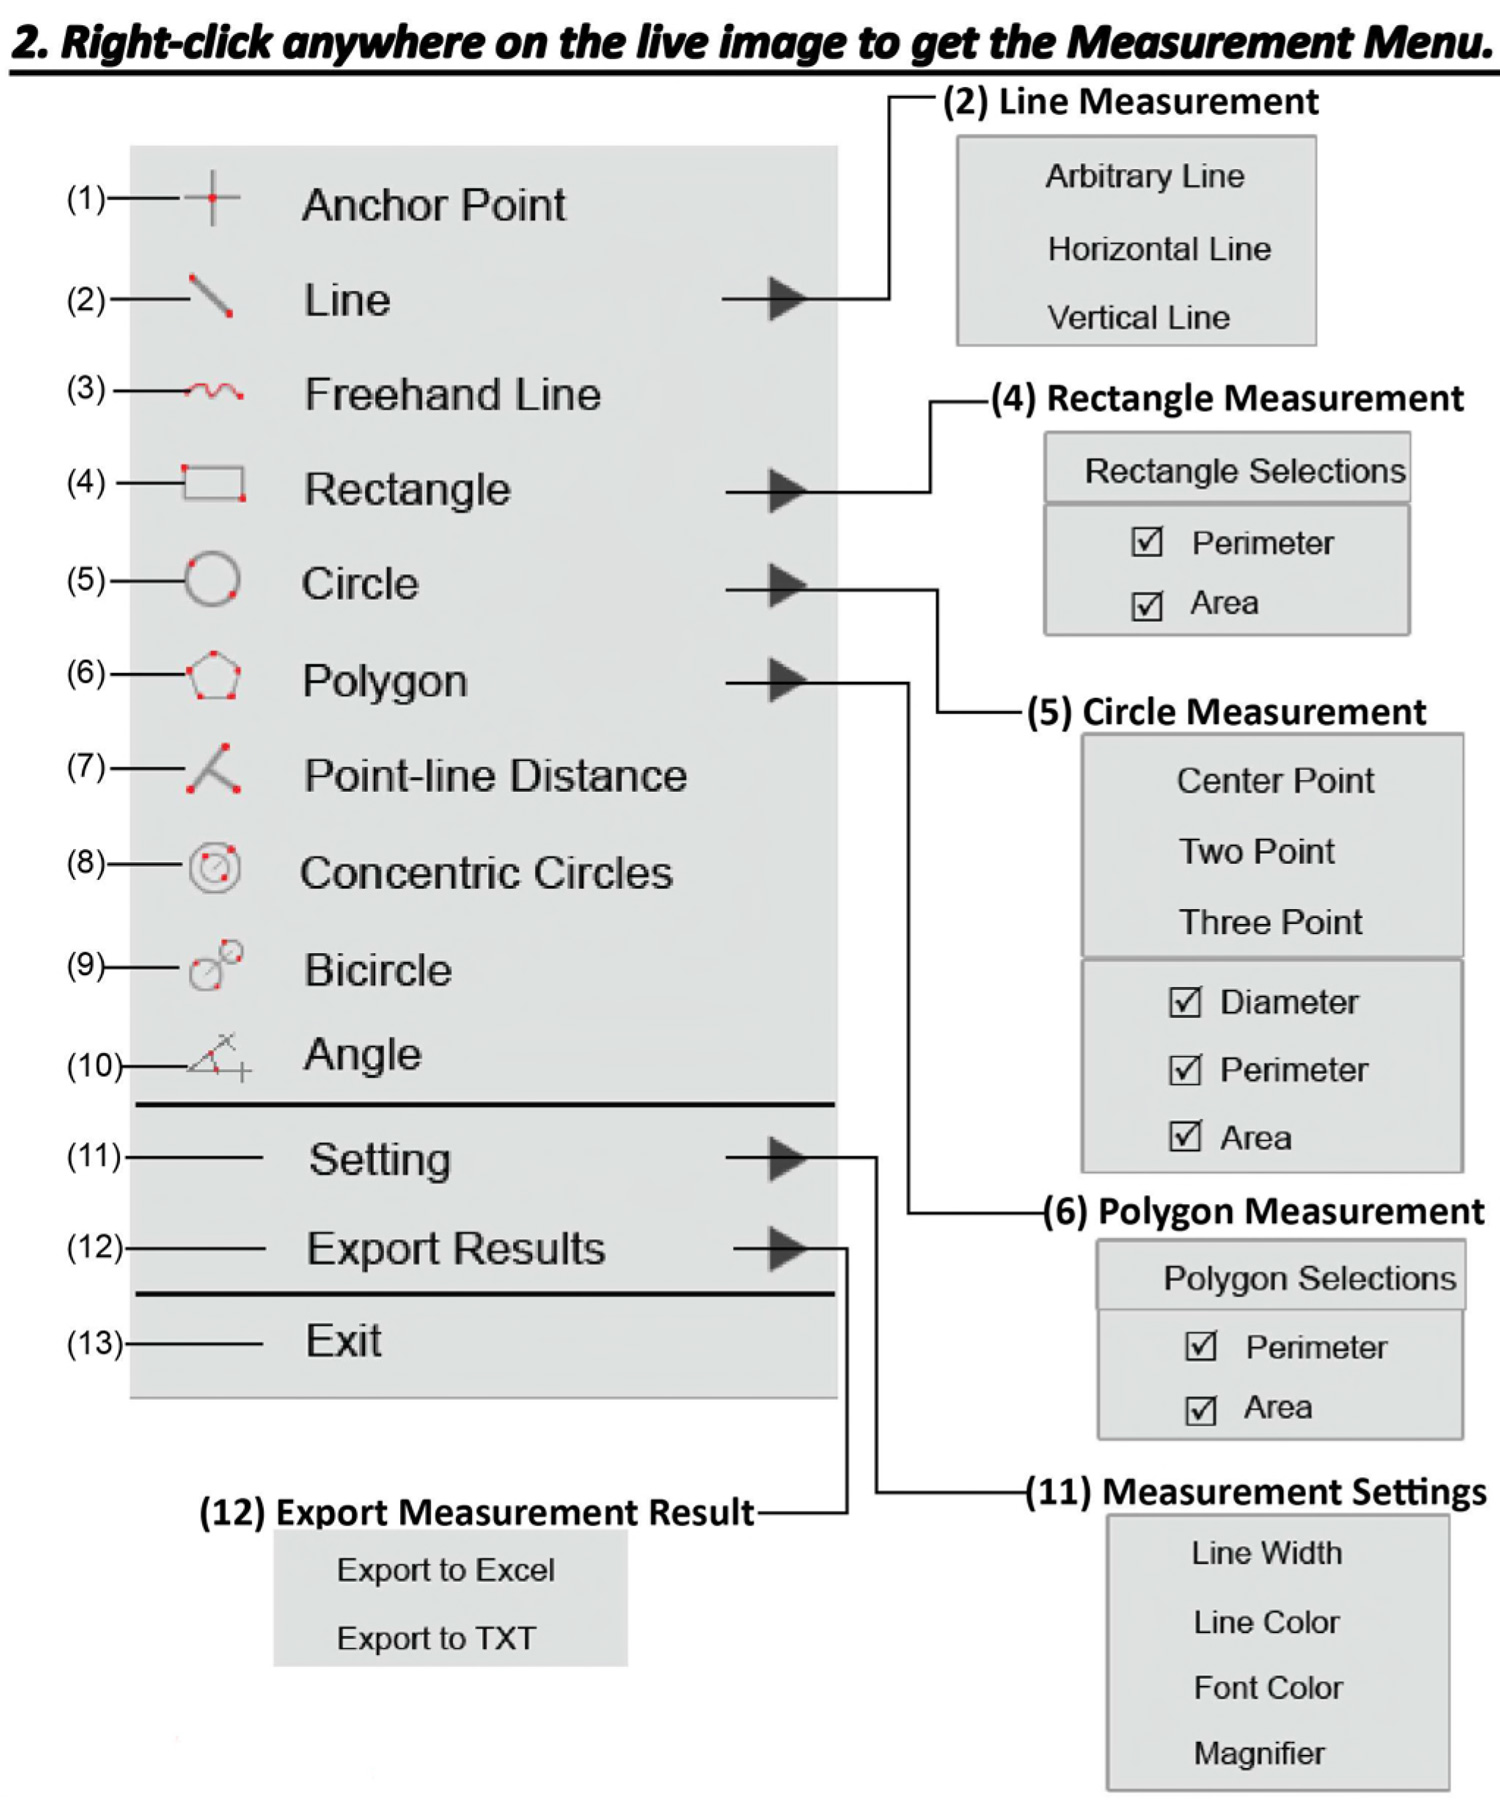
(1) Anchor Point (2) Line |
|
|
(3) Freehand Line |
|
|
(4) Rectangle |
|
|
(5) Circle |
|
|
(6) Polygon |
|
|
(7) Point-line Distance |
|
|
(8) Concentric Circles |
|
|
(9) Bicircle |
|
|
(10) Angle |
|
|
(11) Setting |
|
|
(12) Exports Results |
|
|
(13) Exit |
Note: All the measurements on the live image will be removed when you exit the mesurement.
The mesurement result can be saved on the captured images if capture images before exit measurement.


