
A popular method of taking still pictures of specimens or processes with a microscope is using a 35mm SLR type camera. These basic instructions and information explain how to install the camera adapter. For those using consumer grade digital still cameras, you can find that information HERE. 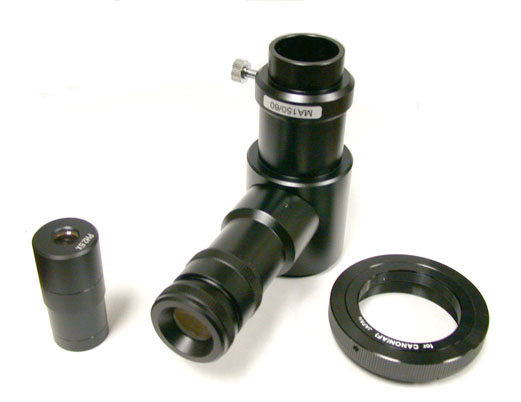
For this example, we are going to use our EMZ-13TR microscope head mounted on a PBH stand, the camera adapter part numbers MA150/60 (tube), T2-9 (adapter ring), MA512 (photo eyepiece) and a Canon EOS camera. The following information may or may not apply specifically for your specific model of camera or microscope however the basic steps for the most part are the same.
By-the-way, the EMZ-13TR and EMZ-8TR are unique within the EM Series microscope line as they feature a constantly active trinocular tube. Other models have a lever to engage which moves the image from one of the eyetubes to the trinocular tube rendering that one eyetube without an image.
Let's start with mounting the camera onto the scope.
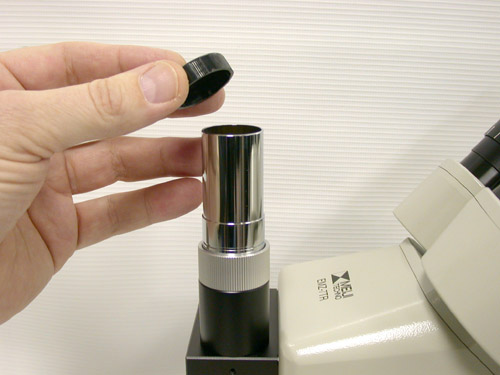
First, we are going to remove the dust cap from the trinocular tube on the microscope.
Your trinocular tube may instead stick out directly from the top of the microscope head.
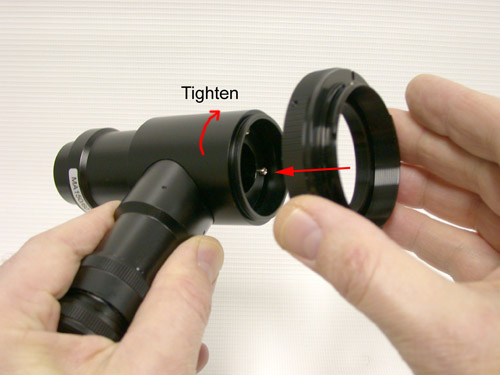
Next, we screw on the camera adapter ring onto the camera attachment.
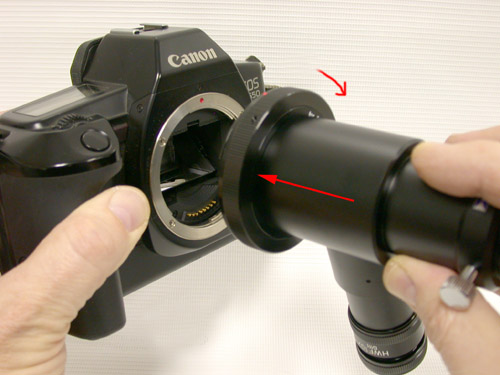
Now we will install the completed setup onto the camera body.
BTW, if you are using a digital camera body that has the SLR type lens aperture, you can use this 35mm adapter system as well with excellent results.
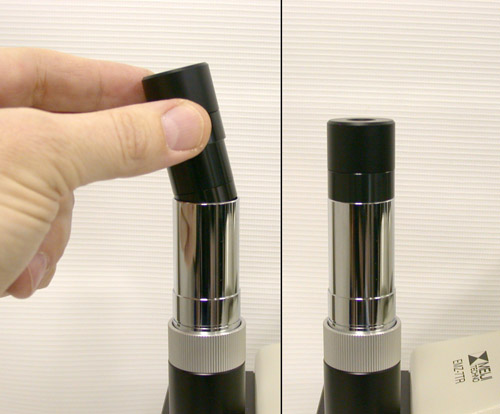
The next step is to install the photo eyepiece onto the trinocular tube.
It just drops into place.
The remainder of the setup will slide on top of the photo eyepiece and the tube itself.
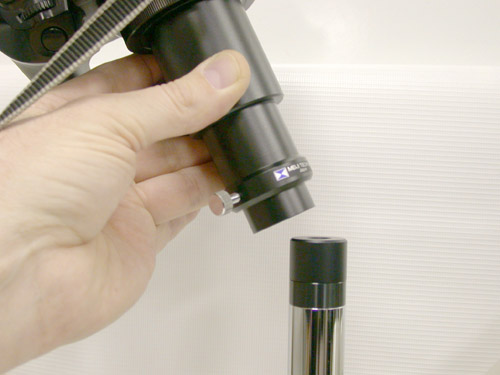
Take your camera with the adapter tube installed and slide it on top of the tube with the photo eyepiece in place.
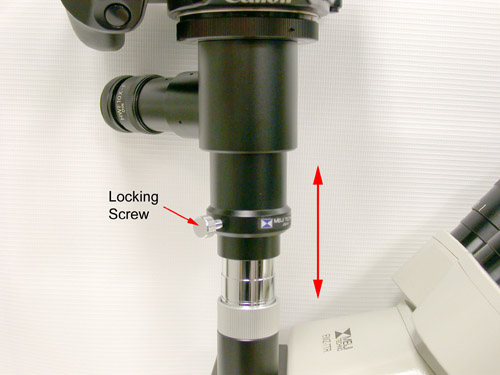
With the adapter in place, use the locking set screw to secure the installation.
After you have your microscope parfocalled and adjusted with a specimen in place, one can loosen the set screw and slide the whole assembly up or down to parfocal the camera setup to the microscope. Additionally, the top chrome portion of the trinocular tube on the EMZ-8TR can be screwed in or out to adjust the length of the tube. On the EMZ-5TR, one can loosen the set screw on the side of the trinocular tube and slide it up and down to adjust.
Once this is done, if the microscope is in focus, so will the camera and should not require further adjustment.
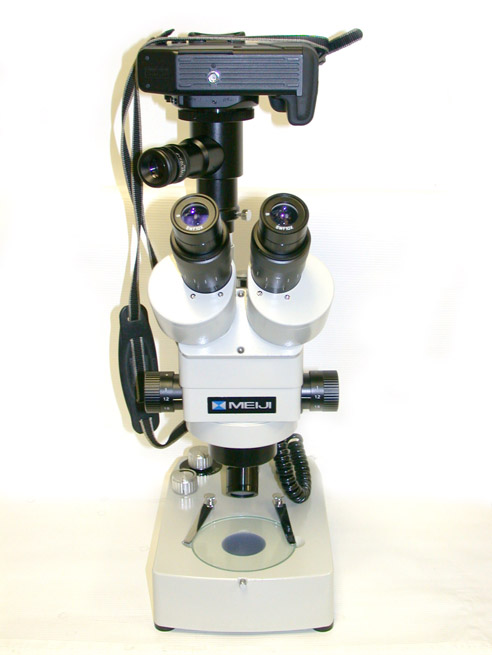
Here's a picture of our completed setup.
The focusing eyetube on the camera adapter allows the user to adjust focus without having to look through the camera viewfinder which is facing straight up.
The camera adapter is available WITHOUT the focusing eyetube. That part number would be MA150/50.
In regards to photo quality: to increase contrast of an image when using black and white film, one should consider using a contrasting filter, usually green or red.
Typically, ISO 100 speed film is used in photomicroscopy with various films available having compensation for the color temperature of the illumination being used i.e. tungsten or halogen. ISO 50 or 25 film can be used to cut down on the "grainy-ness" of photographs.
For digital SLR cameras, they often require using manual mode as some auto settings do not "see" enough light for the shutter to open.
The internet has a wealth of information regarding photomicroscopy methods and equipment. We suggest that users spend time researching film types and film exposure settings for the kind of specimens, observation methods and illumination they'd like to employ.


