Gout Testing
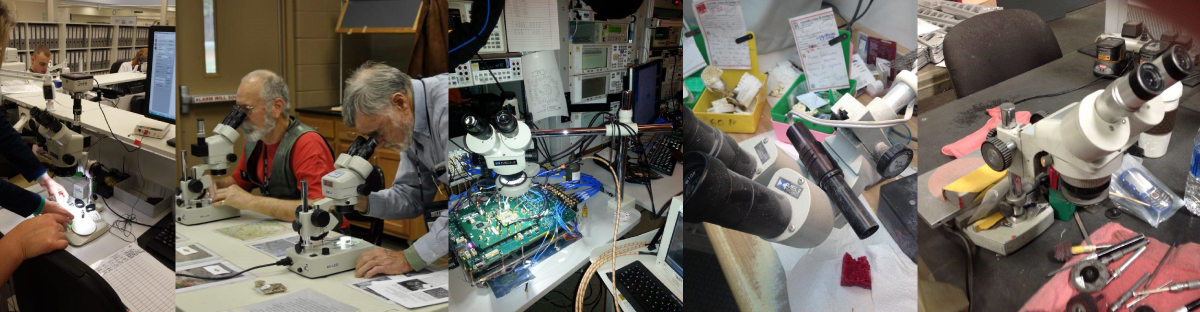
For specialized medical applications, such as identifying gout or CPPD (pseudo-gout) crystals suspended in synovial fluid, Meiji Techno has a dedicated microscope solution for labs and health officials worldwide, the MT9500 Series.
Medical professionals diagnose gout or pseudo-gout by taking synovial fluid from the infected joint in the process of arthrocentesis.
A lab technician prepares a wet smear on a slide and uses polarized microscopy to determine the presence of sodium urate crystals (gout) or calcium pyrophosphate dehydrate or "CPPD" (pseudo-gout) within the fluid extracted from the infected joint.
If a polarizing microscope is not available, a tentative diagnosis can be made if needle-shaped monosodium urate crystals are identified using ordinary light microscopy.
CPPD crystals are small rods, squares, or rhomboids and are usually harder to identify with light microscopy
Identifying the Microscope Components
The two main components that comprise the polarization elements that are used in the identification of gout and pseudo-gout crystals are the analyzer and the full wave plate polarizer, shown below:
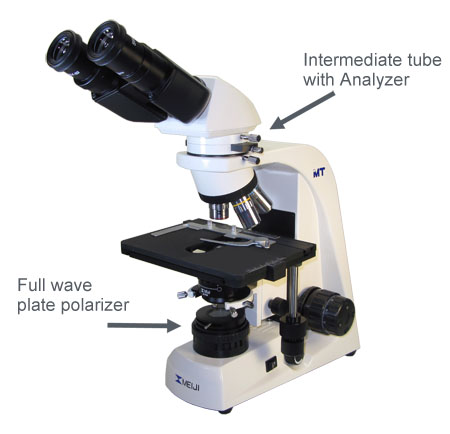
The analyzer is fixed within the intermediate tube and the polarizer is integrated above the transmitted light.
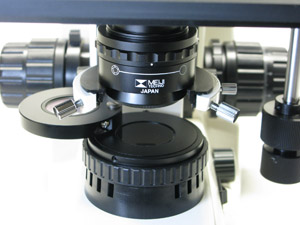
Raise the condenser to its upper stop position and orient the polarizer on top of the illuminator as shown above.
Polarizer and Wave Plate Set Up
1. Rotate the full wave plate out of the light path as shown below:
2. Turn on the illuminator.
3. Slide the Analyzer into the optical path.
4. Look into the microscope. The polarizer has already been positioned so that the image is at extinction, so the field of view should be black.
5. Tighten the locking screw to secure your setting.
Identifying the Crystals - Gout
The following procedure is for identification of gout (for pseudo-gout, see the next section). To ensure the accuracy of the test, a slide of known monosodium urate crystals should be used for reference.
1. Swing the full wave plate out of the light path.
2. Place the slide onto the stage and bring the crystals into sharp focus. The needle-shaped crystals in every direction should appear white.
3. Swing in the full wave plate with the lever in the leftmost position. Crystals pointing in the North-South direction should appear yellow; crystals in the East-West direction should appear blue. (see Figure 1)
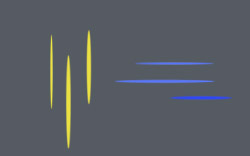
Figure 1
4. Move the lever to the extreme right position and the reverse should occur: North-South crystals are now blue and East-West crystals are now yellow (see Figure 2). This confirms the presence of gout.
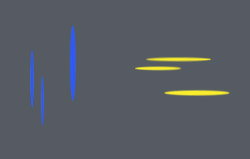
Figure 2
Identifying the Crystals - Pseudo-gout
The following procedure is for identification of pseudo-gout. To ensure the accuracy of the test, a slide of known calcium pyrophosphate dehydrate crystals should be used for reference.
1. Swing the full wave plate out of the light path.
2. Place the slide onto the stage and bring the crystals into sharp focus. The needle-shaped crystals in every direction should appear white.
3. Swing in the full wave plate with the lever in the leftmost position. Crystals pointing in the North-South direction should appear blue. Crystals in the East-West direction should appear yellow (see Figure 3).
Figure 3
4. Move the lever to the extreme right position and the reverse should occur: North-South crystals are now yellow, and East-West crystals are now blue (see Figure 4). this confirms the presence of pseudo-gout.
Figure 4
| Crystal Type | Orientation Handle Position | Crystal Orientation Color | |
| North-South | East-West | ||
| Uric Acid or Monosodium Urate | Left | Yellow | Blue |
| Right | Blue | Yellow | |
| Calcium Pyrophosphate (Pseudo Gout) | Left | Blue | Yellow |
| Right | Yellow | Blue | |


