
|
Installing Zernike Phase Contrast Accessories on
MT Series Microscopes
|
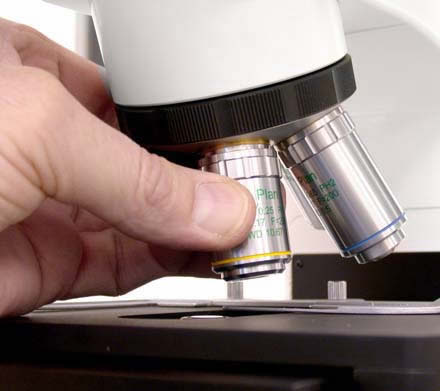 |
The first step would be to remove your standard brightfield objectives from the microscope and return them to their plastic containers. Next, install your Phase Contrast objectives in the nosepiece in their proper order: 10X, 20X, 40X & 100X, for example. Keep the
plastic containers on hand for your
phase objectives. |
||
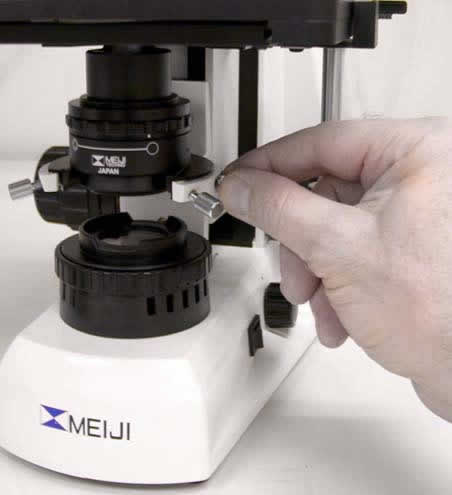 |
The standard
Abbe Condenser needs to be removed. Condensers
cannot be removed unless the
stage is racked up all the way and the
condenser rack is lowered all the way.
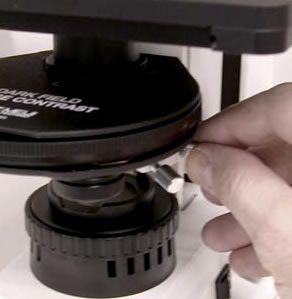
Next,
unscrew the chrome locking thumbscrew
which is on the right-hand side behind
the chrome centering screw as shown in
the picture at left.
|
||
 |
The
condenser should be loose at this point
and simply pull the unit straight out
the front.
|
||
 |
The Zernike
Condenser can now go in place.
|
||
 |
Tighten the locking thumbscrew snugly and then rack the condenser up all the way. |
||
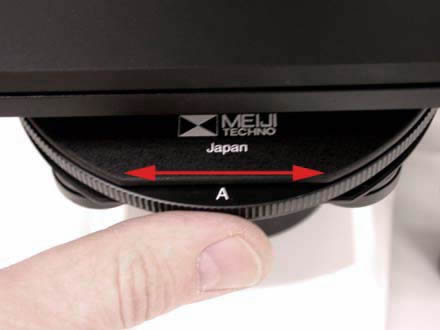 |
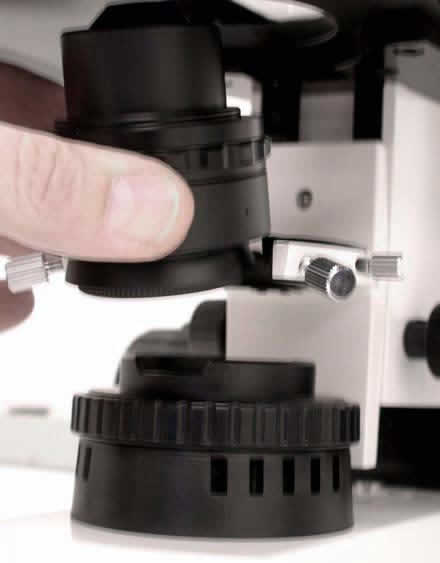
Next, we will center the iris. Turn on the power switch and adjust the brightness knob to a comfortable level. Rotate the Zernike condenser settings wheel so that the "A" position is engaged as shown in the picture at left. |
||
 |
Rotate the 10X objective into the working position. Close the "Iris Adjustment" by cranking the knob all the way to the left. When looking into the eyepieces, one will see the aperture hole of the diaphragm. It may or may not be centered in the field of view or FOV. You may also need to focus the microscope so the edges of the aperture hole are clear to see. |
||
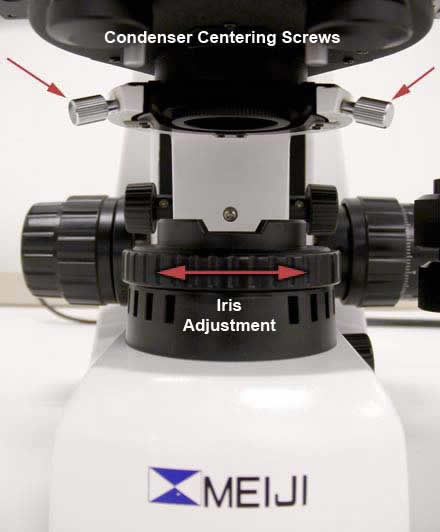 |
Place each
hand on each of the "Condenser Centering
Screws" while at the same time, looking into
the eyepieces and adjusting the centering
screws until the aperture hole is in the
center of the FOV.
|
||
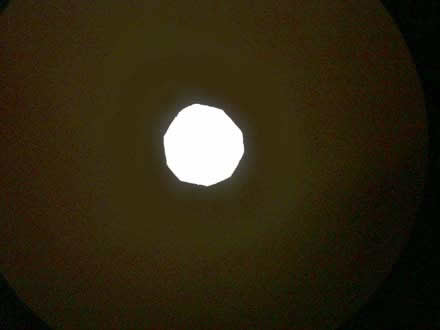 |
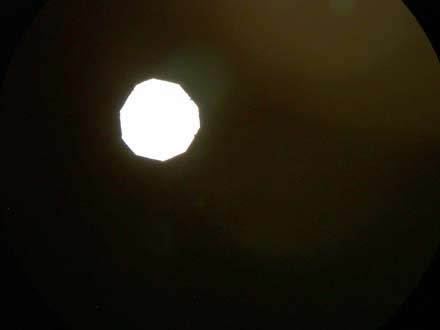
When
centered, the aperture will be in the
center of the field of view as
demonstrated in the picture at left.
|
||
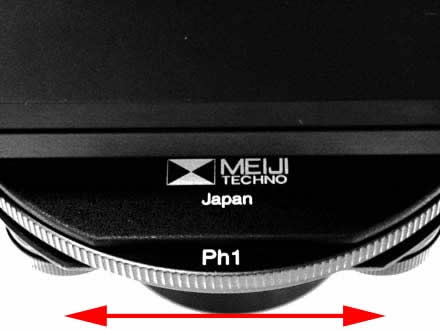 |
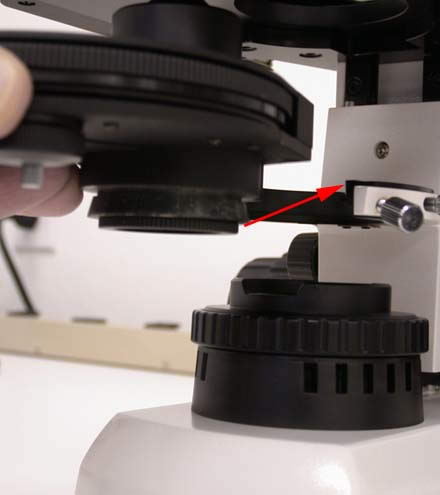
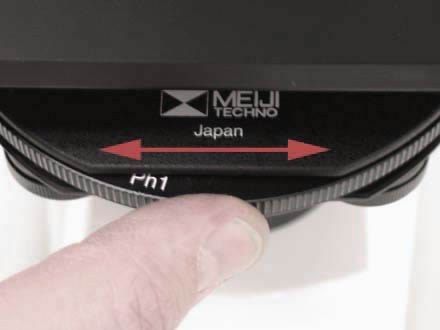
With the 10X objective still in the working position, rotate the Zernike Condenser control until the "Ph1" position is engaged as shown. |
||
|
|
Next, check to see if the set screws on the bottom of the Zernike Condenser are loosened. The set screws will need to be loosened for the larger adjustment knobs to be able to adjust. |
||
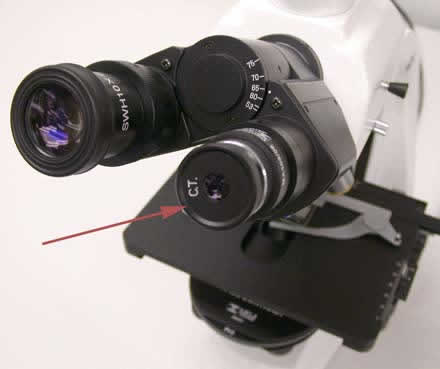 |
Next, remove the right eyepiece and in its place, insert the centering telescope. The top of the centering telescope has a focus adjustment which will be held in one hand with the other hand holding the body. While looking into the centering telescope, adjust the focus so you may get a sharp image of the phase annuli to be adjusted. |
||
 |
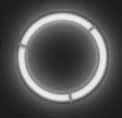
When the annuli are not aligned, one will see an image similar to the picture at left: one light ring is not aligned with the other. |
||
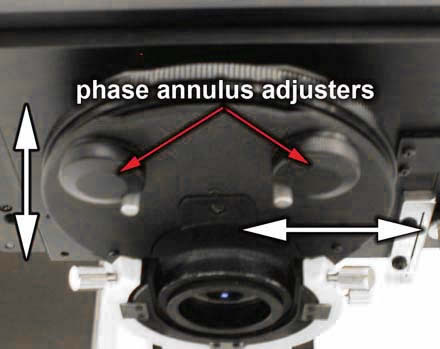 |
To bring the annuli into alignment, place each hand on each annulus adjustment knob and while looking into the eyetubes, bring the annuli into common alignment. |
||
 |
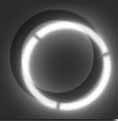
When the annuli are aligned, one will see an image similar to the photo at left. Each light ring is imposed on the other making one aligned ring. |
||
 |
The "Ph1" position is the annulus for the 10X objective. The other positions are: Ph2 = 20X and
40X Phase Annulus |
||
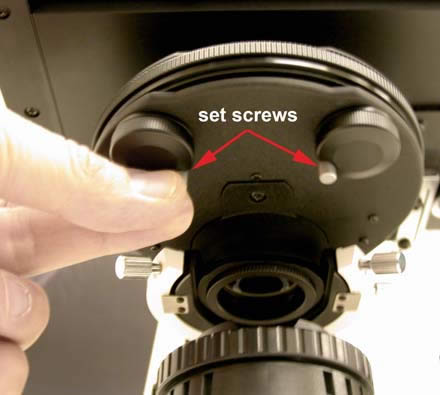 |
Repeat the annulus alignment for the 20X/40X and the 100X objectives by using the Ph2 and Ph3 settings on the Zernike Condenser. When finished, lock down the settings by tightening the "set screws" as shown in the picture at left. The annulus adjustments should be checked occasionally or when accessories are swapped. |
||
About Us |
Contact Us | Choosing a Microscope |
Accessories |
Literature |
Service | Warranty
|
|||